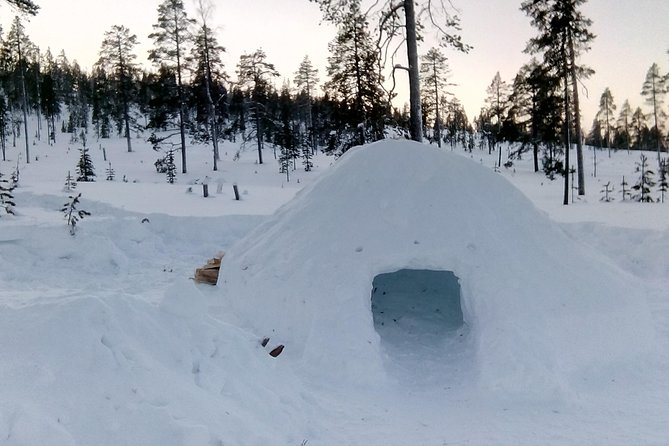
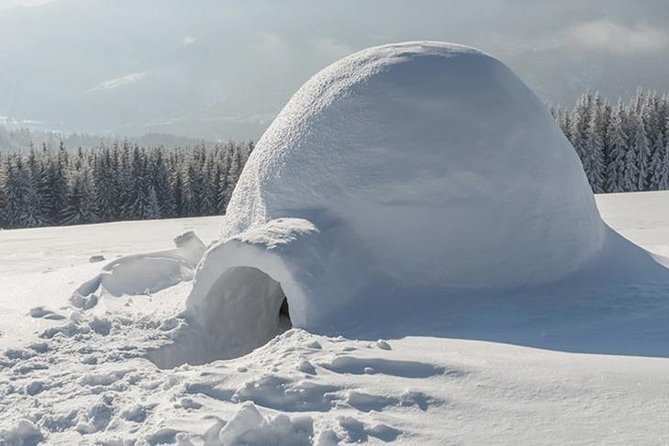
Nestled within the enchanting Arctic landscape of Rovaniemi, the capital of Lapland, Finland, building a snow igloo offers a truly unique winter experience. Crafting this iconic snow shelter requires proper planning and execution, from selecting the right location to shaping the intricate dome structure. With a bit of know-how and the right tools, adventurers can create a cozy retreat that not only shields them from the elements but also immerses them in the captivating ambiance of the frozen tundra. However, the real challenge lies in mastering the techniques to ensure a sturdy and comfortable igloo that can withstand the harsh Nordic climate.
Quick Points

- Select a flat, firm location in Rovaniemi with ample, dense snow and minimal obstructions to construct a stable and weather-resistant igloo.
- Gather essential tools like a snow saw, knife, and shovel, and ensure the snow blocks are uniform in size for a sturdy structure.
- Build a solid foundation by compacting the snow and stacking the blocks in a spiral pattern, decreasing the diameter as the height increases.
- Construct the igloo’s walls by shaping and carving the snow blocks to create a curved, self-supporting dome, ensuring a tight fit and smooth surface.
- Complete the igloo by placing a central block at the top and building the ceiling in a spiral pattern, filling gaps with loose snow for insulation and weather protection.
Choosing the Right Location
Choosing the right location is crucial when building a snow igloo. The site should be on a flat, firm surface with plenty of snow. Avoid areas with rocks, vegetation, or other obstructions that could compromise the structure.
Look for a location sheltered from the wind, as this will help maintain the igloo’s warmth and stability. When selecting the spot, consider factors like accessibility, proximity to other amenities, and the quality of the snow.
Experienced guides will help identify the optimal site, ensuring the igloo is built to withstand the harsh Finnish climate. With the right location, the construction process can begin, leading to a cozy and unforgettable snow dwelling.
Here are more great tours and experiences we've reviewed in Rovaniemi
Gathering the Necessary Supplies

With the location secured, the next step in building a snow igloo involves gathering the necessary supplies. Participants will need a snow saw, a knife, and a shovel to harvest the snow blocks.
The blocks should be uniform in size, approximately 12 inches wide, 5 inches high, and 3 inches deep. It’s crucial to select snow that’s dense and cohesive, as it will provide the structural integrity needed for the igloo.
Plus, participants should bring warm clothing, gloves, and a headlamp or flashlight to ensure their comfort and safety during the construction process.
Constructing the Igloo’s Foundation
Once the necessary supplies have been gathered, the construction of the igloo’s foundation begins. The first step is to pack down the snow to create a solid base. This is done by walking in a circular pattern, compacting the snow as you go.
The goal is to create a flat, level surface that will support the weight of the igloo’s walls. Once the base is prepared, the builder starts stacking the snow blocks in a spiraling pattern, gradually decreasing the diameter as the igloo rises.
The blocks are carefully shaped and fitted together, creating a sturdy and stable foundation for the structure. This process requires patience and attention to detail to ensure the igloo’s structural integrity.
Building the Igloo’s Walls
After the foundation is laid, the builder begins constructing the igloo’s walls.
Using blocks of compacted snow, the builder stacks them in a spiral, creating a self-supporting dome. Each layer is slightly inset from the one below, gradually forming the igloo’s distinctive curved shape.
As the walls rise, the builder carves and sculpts the blocks, ensuring a tight fit and smooth surface. This process requires skill and attention to detail, as the integrity of the structure depends on the precision of the wall construction.
With each block carefully placed, the igloo takes shape, transforming the snowy landscape into a temporary, yet sturdy, shelter.
Creating the Igloo’s Ceiling
As the snow igloo’s walls near completion, the builder turns their attention to crafting the ceiling. The key is to create an arch that supports the weight of the snow above.
They begin by placing a central block at the top, then carefully positioning additional blocks in a spiral pattern, each one slightly smaller than the last. The spaces between the blocks are filled with loose snow, which helps to bind the structure together.
The final step is to smooth the inner surface, ensuring a rounded, dome-like shape. With patience and skill, the builder constructs a sturdy, weather-resistant ceiling that will keep the interior of the igloo warm and cozy.
Decorating the Igloo’s Interior
With the sturdy ceiling in place, the builder turns their attention to decorating the igloo’s interior. They use the remaining snow blocks to create shelves and seating along the walls, providing functional and visually appealing elements.
Next, they gather pine branches and other natural materials found nearby, artfully arranging them to add warmth and texture.
Candles or small lanterns are strategically placed, casting a soft glow throughout the space.
The final touch is a plush fur rug or blanket, inviting guests to sit and fully enjoy the cozy, winter wonderland atmosphere.
Decorating the igloo’s interior elevates the experience, creating a memorable and enchanting retreat from the cold.
Staying Warm Inside the Igloo
Once the igloo’s interior is decorated, the focus shifts to ensuring occupants stay warm and comfortable inside. Participants are advised to wear insulating base layers, warm socks, and waterproof outerwear.
The igloo’s compact design and thick snow walls help trap heat, but participants may also use sleeping bags or liners for additional warmth. Hot beverages and snacks are provided to further ward off the cold.
Experienced guides ensure the igloo’s temperature remains comfortable throughout the experience. With the proper preparation and equipment, guests can enjoy a cozy and memorable overnight stay in the snow-sculpted shelter.
Experiencing the Igloo’s Ambiance
Stepping inside the snow-sculpted igloo, one is immediately struck by the cozy, intimate ambiance.
The soft, diffused lighting creates a warm, inviting atmosphere, while the walls’ glistening, translucent surfaces reflect the light, giving the space a dreamlike quality.
The smooth, rounded contours of the igloo’s interior foster a sense of seclusion and privacy, allowing visitors to fully enjoy the unique experience.
The igloo’s design not only insulates against the cold but also amplifies the muffled sounds of the outside world, creating a peaceful sanctuary where one can truly appreciate the tranquility of the Arctic environment.
The igloo’s ambiance invites visitors to pause, relax, and savor the moment.
The Final Verdict
Constructing a snow igloo in Rovaniemi provides an unforgettable Arctic adventure. With the right location, tools, and techniques, visitors can create a cozy, snow-covered retreat complete with natural decor and warm lighting. Inside, they’ll experience the igloo’s serene ambiance, sheltered from the elements and surrounded by the enchanting Finnish landscape.
More Winter Activities in Rovaniemi
More Tour Reviews in Rovaniemi
Not for you? Here's more things to do in Rovaniemi we have recnetly reviewed
- 25 Best BBQ Experiences In Rovaniemi
- 18 Best Canoe And Kayak Experiences In Rovaniemi
- 6 Best Cruises And Boat Tours In Rovaniemi
- 8 Best Full-Day Tours In Rovaniemi
- 2 Best 3 Day Tours In Rovaniemi
- 2 Best Lunch Experiences In Levi
- 2 Best Food Tours In Rovaniemi
- 20 Best Photography Experiences In Rovaniemi
- 16 Best Dining Experiences In Rovaniemi
- 16 Best Dinner Tours In Rovaniemi
- 22 Best Lunch Experiences In Rovaniemi
- 7 Days Winter Lapland Nature Experience
